
Knowing how to take a screenshot on a PC isn't just a neat trick; it's a core productivity skill. The go-to method for a quick capture is hitting the Print Screen (PrtScn) key. This instantly grabs your entire screen. Need just the active window? Alt + PrtScn is your best friend. These simple shortcuts are the fastest way to get a visual record of what's on your display.
Why Screenshots Are Your Secret Weapon for Clear Communication
Think about it: a screenshot is a powerful communication shortcut. It’s the difference between trying to describe a weird software bug to your IT team and just showing them the exact error message. A single image can replace paragraphs of text, eliminating confusion and saving everyone time.
Whether you're creating a step-by-step training guide or just saving a key slide from a webinar, a well-timed screen capture says it all. This guide will walk you through the built-in Windows tools you already have, so you can capture precisely what you need, every single time.
We'll cover how to:
- Use the classic Print Screen key for quick, full-screen grabs.
- Get more precise with the Snipping Tool and its more modern cousin, Snip & Sketch.
- Turn your basic captures into polished, professional-looking visuals with a simple tool like GrabShot.io.
The Go-To Methods Baked into Windows
The way we take screenshots is deeply rooted in the history of Windows itself, which is why keyboard shortcuts are so ingrained in the process. With Windows 11 holding a global market share of around 49.05% and Windows 10 not far behind at roughly 40.84% as of September 2025, the Print Screen key has become the default for millions. You can dig into the latest numbers on the Windows OS market share on StatCounter.
A screenshot is often the fastest way to show, not just tell. It turns abstract problems into concrete evidence, making collaboration and troubleshooting so much easier.
Ultimately, getting comfortable with these different methods will make your workflow smoother. You’ll create clearer documentation, give better feedback, and share information more effectively. It really changes how you capture and communicate what's on your screen.
Before we dive into the step-by-step instructions, let's take a quick look at the built-in tools Windows offers. This will help you decide which one is right for the job at hand.
Windows Screenshot Methods at a Glance
This table breaks down the key differences between the screenshot tools that come standard with every Windows PC.
| Method | Best For | How to Access | Key Feature |
|---|---|---|---|
| Print Screen Key | Instantly capturing the entire screen without any fuss. | Press the PrtScn key. | The absolute fastest way to grab everything on screen. |
| Snipping Tool | Precisely selecting a specific area of your screen. | Search for "Snipping Tool" in the Start Menu. | Offers multiple snip modes (rectangular, free-form, etc.). |
| Snip & Sketch | Capturing and immediately annotating your screenshot. | Press Win + Shift + S. | Built-in markup tools for drawing and highlighting. |
Each tool has its place, from the raw speed of Print Screen to the editing power of Snip & Sketch. Now, let's get into the details of how to use each one.
Using the Print Screen Key for Instant Captures
Let's kick things off with the old reliable, the classic Print Screen key. You'll usually see it labeled as PrtScn on your keyboard. For a quick, no-fuss screenshot, this single button has been the go-to for decades, and for good reason—it's fast and universally available.
The real magic happens when you pair it with a couple of other keys. These simple combinations give you a surprising amount of control, letting you grab exactly what you need without wrestling with extra tools.
Three Essential Print Screen Shortcuts
Think of these as your fundamental screenshotting moves. Each one does something slightly different, whether it's copying your screen, nabbing just one window, or saving a file right away.
-
PrtScn Key: Tapping this key on its own is the most straightforward option. It copies an image of your entire screen—everything you can see—to the clipboard. This is perfect for when you need to quickly drop a full-screen view into an email, a chat, or a document.
-
Alt + PrtScn: This one is my personal favorite for targeted captures. It intelligently grabs only the active window you're currently working in. So, if you get a weird error message or want to share a specific program without all your desktop icons and other windows, this is the combo to use. It keeps things clean and focused.
-
Windows Key + PrtScn: If you want to save a file without any extra steps, this is your shortcut. It captures the whole screen and automatically saves it as a PNG file. You'll find it tucked away in a dedicated "Screenshots" folder inside your Pictures library. No pasting required.
This handy visual shows you exactly where to find the Print Screen key and what it can do at a glance.
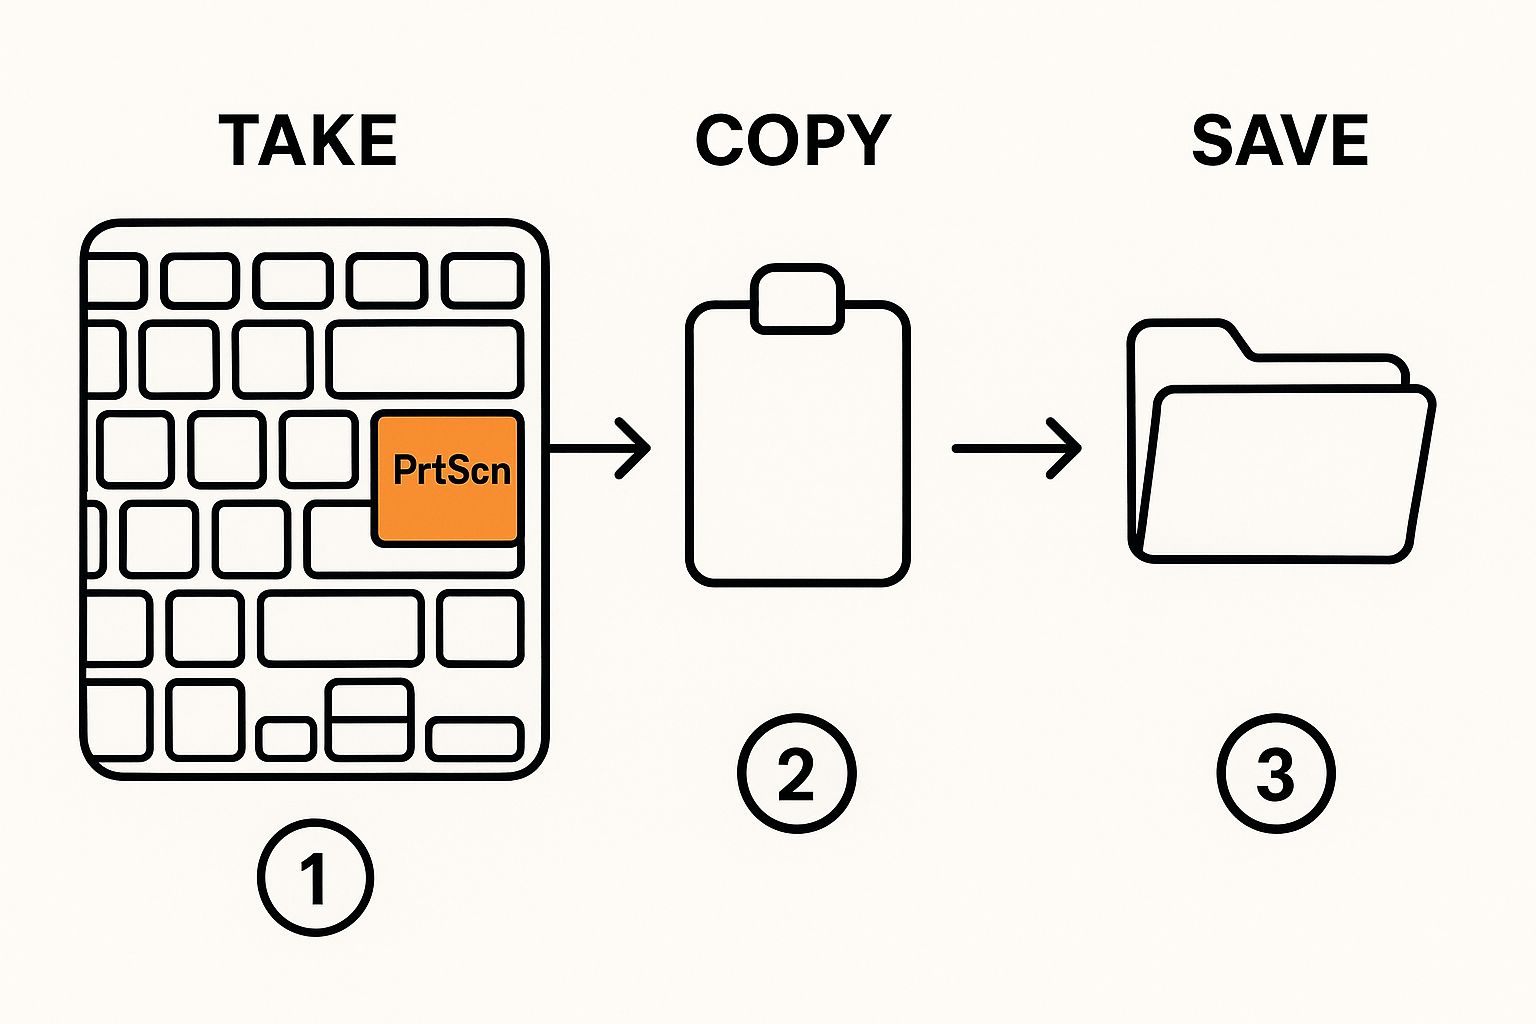
As you can see, this single key is the command center for basic screen captures on just about any PC keyboard out there.
Pro Tip: Remember, when you use
PrtScnorAlt + PrtScn, the image is temporarily stored on your clipboard. To actually see or save it, you need to paste it (Ctrl + V) into an app like Paint, Photoshop, or even a new email. If you don't paste it, the next thing you copy will replace it.
This keyboard-first approach is an industry standard. In 2023, Lenovo and HP Inc. were the giants of the PC world, shipping nearly half of all units globally. Their massive market presence means these shortcuts are baked into the muscle memory of millions of users. You can dig into the numbers and see the breakdown of PC vendor market shares on Statista.
Gaining Precision with Snipping Tool and Snip & Sketch
While hitting the Print Screen key is fast, it’s a bit of a blunt instrument. It captures everything. When you only need a specific part of your screen—a single chart from a busy report or one comment in a long forum thread—you need something with more precision.
This is where Windows’ built-in selection tools come in. The classic Snipping Tool and its more modern replacement, Snip & Sketch, are your best friends for this. Instead of capturing the whole screen and then painstakingly cropping it down, these tools let you select exactly what you want from the get-go. It’s a huge time-saver and gives you a much cleaner result, which is crucial when you're creating screenshots for work.
Mastering Different Capture Modes
Both tools give you some great options for how you grab your screenshot, so you can adapt to pretty much any situation. The one I use most often is the Rectangular Snip. You just click and drag a box around whatever you need. Simple.
But there are other modes that are incredibly useful:
- Window Snip: This is fantastic. It automatically detects and highlights an entire application window or a dialog box. One click and you’ve got a perfect shot of just that window, nothing else.
- Full-screen Snip: Does exactly what it says on the tin—captures your entire screen, just like the good old Print Screen key.
- Free-form Snip: For those times you need to grab something with an odd shape, this mode lets you draw completely freehand around your target.
Here’s a look at the classic Snipping Tool interface. You can see how straightforward it is, with the different modes right there.
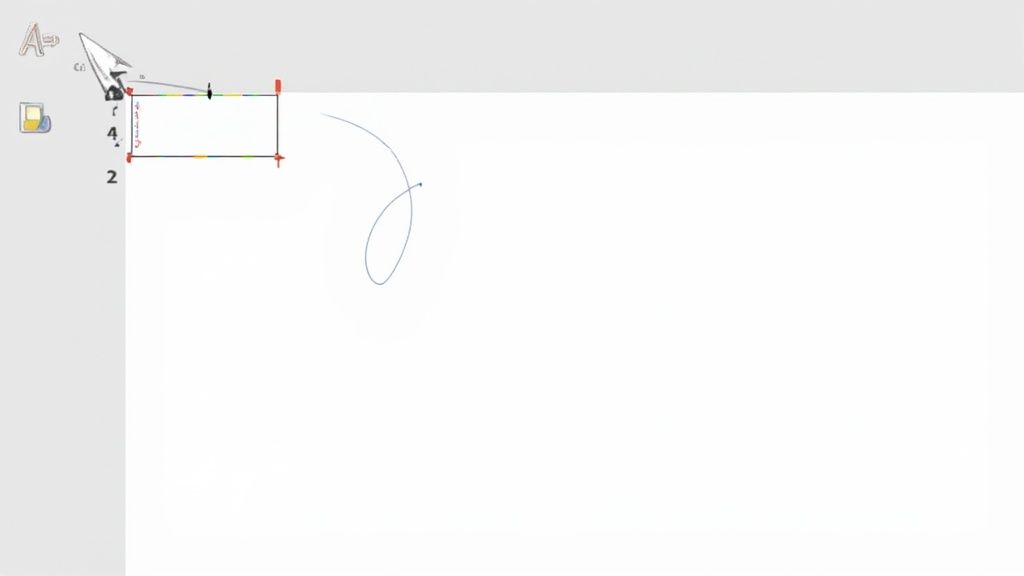
The "New" button kicks things off, and the "Mode" dropdown lets you pick your capture style.
For an even quicker workflow, the newer Snip & Sketch has a killer shortcut: Win + Shift + S. Pressing this instantly dims your screen and pops up a small toolbar at the top. From there, you can choose your mode and take the shot without ever opening the full app. It's the fastest way to make a precise selection.
Pro Tip: The Delay function is a lifesaver. Ever tried to screenshot a dropdown menu that vanishes the second you move your mouse to take the shot? It’s maddening. Just set a 3-second delay, open the menu you need, and wait. The tool will automatically capture the screen for you.
After you grab your snip, it immediately opens in a basic editor. This is where the magic happens for quick communication. You can use the built-in pen and highlighter to circle a key number, underline a sentence, or draw an arrow to point something out. Being able to mark up your screenshot instantly is what makes these tools so much more powerful than just a simple screen grab.
Taking Your Screenshots to the Next Level with GrabShot.io
While the built-in Windows tools are perfect for a quick grab, there are times when "good enough" just doesn't cut it. Knowing how to snap a picture of your screen is one thing, but turning that raw image into something polished and professional is a completely different ballgame.
This is exactly where a specialized tool like GrabShot.io shines. It’s not about replacing your Snipping Tool; it’s about giving your captures a powerful finishing touch without firing up complex design software.
The need for higher-quality screen captures is exploding. In fact, the market for website screenshot software was valued at around USD 500 million in 2024 and is projected to more than double to USD 1.2 billion by 2033. This growth, detailed in a full analysis of the screenshot software market, is all about the increasing demand for crystal-clear visuals in marketing, training, and development.

From a Raw Snip to a Refined Visual
Let's say you just captured a screenshot of a new software feature you're documenting. Instead of just pasting that flat, context-free image into your guide, GrabShot.io lets you instantly add professional layers that make it far more effective.
With just a few clicks, you can completely change the game:
- Add a Browser Frame: Wrap your capture in a clean browser window to give it immediate context.
- Insert Numbered Annotations: Effortlessly point out key elements in a sequence, guiding your viewer's attention exactly where it needs to go.
- Apply a Clean Background: Swap out your messy desktop for a simple, elegant background color or gradient that makes your image pop.
This simple process elevates a basic screenshot from a static picture into a self-explanatory visual aid. It’s the secret to creating compelling social media posts, unambiguous bug reports for developers, or genuinely helpful knowledge base articles.
For anyone in marketing, support, or development, this is a huge time-saver. It closes the gap between taking a quick snip and producing a publish-ready graphic, helping you communicate with more clarity and impact.
Built-in Tools vs. GrabShot.io Enhancement
To see the difference clearly, let's compare what you get out of the box with Windows versus what a quick enhancement can do.
| Feature | Windows Tools (Snipping Tool/Snip & Sketch) | GrabShot.io Enhancement |
|---|---|---|
| Basic Capture | Yes (Full screen, window, rectangle, freeform) | N/A (Enhances existing captures) |
| Simple Annotations | Yes (Pen, highlighter, eraser) | Yes (Arrows, text, shapes, numbers) |
| Backgrounds | No (Transparent background on PNG saves only) | Yes (Custom colors, gradients, images) |
| Device Frames | No | Yes (Browser, phone, and tablet frames) |
| Shadows & Effects | No | Yes (Customizable drop shadows, rounded corners) |
| One-Click Polish | No | Yes (Templates and quick-add features) |
The built-in tools are fantastic for the initial capture, but as you can see, a tool like GrabShot.io is what adds the professional flair that makes your visuals stand out.
Pro Tips for Making Your Screenshots Look Flawless
Knowing how to take a screenshot is one thing, but making it look professional is another game entirely. A few simple habits can take your screen captures from cluttered and confusing to clean and clear. The goal is to create a focused image that gets your point across without any distracting noise.
Before you even think about hitting that Print Screen key, take a second to clean up your digital workspace. Close those extra browser tabs, shut down any applications you don't need, and silence notifications. A tidy desktop or a focused application window means your audience sees exactly what you want them to see. It’s a small step that makes a huge difference.
Fine-Tuning Your Screen Before the Snap
A little prep work can save you a ton of editing time later. One of my favorite tricks, especially when capturing text, is to use the browser zoom. Just hit Ctrl + + to bump up the size a bit. This makes the font look sharper and way more readable in the final image.
Another game-changer is to remap your Print Screen key. Dive into your Windows Settings and you can set the PrtScn key to launch your go-to tool, like Snip & Sketch, directly. This simple tweak turns a multi-step chore into a single, satisfying keypress.
A quick note on file formats: Always save screenshots with text or user interface elements as a PNG. This format is lossless, meaning it keeps lines sharp and text crystal clear. Save JPG for actual photographs, where file size is more important than perfect detail.
Smart Saving Habits and Workflow Hacks
How you save and organize your files can be just as important as the capture itself. Adopting a few good habits will save you headaches down the road.
- Name Your Files Wisely: Ditch
Screenshot (14).pngfor something that actually makes sense, likeNew-User-Dashboard-Layout.png. You’ll thank yourself later. - Create a Screenshot Folder: Keep all your captures for a specific project in one spot. It’s a simple way to stay organized.
- Do a Final Check: Always give your screenshot one last look before you send it off. It’s surprisingly easy to accidentally capture sensitive information you didn’t mean to share.
Answering Your Top Screenshot Questions
So you've mastered the basics, but what happens when things don't go as planned? It happens to everyone. From a stubborn Print Screen key to capturing a webpage that scrolls on forever, some screenshot challenges pop up again and again.
Let's walk through some of the most common snags people hit and get them sorted out. Think of this as the troubleshooting cheat sheet I wish I'd had when I first started.
Why Did My Print Screen Key Suddenly Stop Working?
This is probably the number one question I hear. You press the PrtScn key, and… nothing. It's incredibly frustrating, but the fix is usually simple and doesn't involve buying a new keyboard.
Most of the time, another program has quietly taken over that key. The usual suspects are cloud storage apps like Dropbox or OneDrive. They often set themselves up to automatically save screenshots to the cloud, hijacking the key in the process. Dive into the app's settings, and you can almost always turn this "feature" off.
If that doesn't solve it, it’s worth checking for updated keyboard drivers. But for a quick, reliable workaround, just use Win + Shift + S. That shortcut for Snip & Sketch is a direct command to Windows and almost always cuts through any software conflicts.
A "broken" Print Screen key is rarely a hardware problem. It's almost always a software conflict. Check your cloud app settings first—that's where the solution usually lies.
How Can I Screenshot a Long, Scrolling Webpage?
Ever needed to capture an entire article or a long list on a website? Standard Windows tools just can't do it. They're built to snap what you can see on your screen right now, not what's below the fold.
Trying to manually screenshot, scroll, screenshot again, and then piece them all together is a nightmare. Thankfully, there are much better ways.
You have a couple of great options here:
- Check your browser's built-in tools. Most modern browsers, like Microsoft Edge, have a "Web capture" or "Full page screenshot" function built right in. It’s a lifesaver.
- Grab a browser extension. If your browser doesn't have a native tool, the extension store is full of amazing tools designed to do exactly this. They'll scroll the page for you and stitch it all into one clean image.
Knowing how to take a screenshot on a PC also means knowing when to reach for a more specialized tool. For scrolling captures, these browser-based solutions are definitely the way to go.
Ready to take your captures from basic to brilliant? GrabShot.io lets you instantly add professional frames, annotations, and clean backgrounds to any screenshot. Give it a try for free and see how easy it is at https://grabshot.io.