
Taking a screenshot on a Mac is second nature for most of us, but mastering the nuances can save you a ton of time. At its core, it's all about two simple keyboard commands: Command + Shift + 3 for the whole screen and Command + Shift + 4 for a specific selection.
Think of these as the foundational tools for grabbing anything you see, whether it's for a bug report, a design comp, or just saving something for later.
Your Essential Mac Screenshot Shortcuts
Once you get a feel for a few key combinations, you'll be able to handle pretty much any screen-capturing situation that comes your way. The built-in macOS tools are surprisingly powerful, letting you go from a quick snapshot to a pixel-perfect selection in an instant. It’s all about knowing which tool to grab for the job at hand.
Capturing Your Entire Screen
The simplest way to grab everything is with Command + Shift + 3. Press those three keys, and your Mac instantly snaps a picture of everything on your display.
This is my go-to when I need to save a full-screen design mockup for a quick Slack message or document an entire application window for a support ticket. It’s the digital version of taking a photo of your whole desk—quick, comprehensive, and no fuss.
Selecting a Specific Area
When you need to get more precise, Command + Shift + 4 is the shortcut you'll use 90% of the time. This command turns your cursor into a set of crosshairs. From there, just click and drag to draw a box around the exact area you want to save.
It’s perfect for isolating a single chart from a busy dashboard or grabbing a specific comment from a long social media thread without all the surrounding noise.
Pro Tip: After you hit Command + Shift + 4, don't drag right away. Instead, tap the Spacebar. Your cursor will change to a camera icon. Now you can just hover over any window and click to capture just that window, complete with a nice, clean drop shadow. No more tedious manual cropping.
For a quick reference, here are the shortcuts I use every day.
Mac Screenshot Shortcuts at a Glance
This table breaks down the most common commands and when I've found them to be most useful.
| Shortcut | Action | Best For |
|---|---|---|
| Command + Shift + 3 | Captures the entire screen | Documenting full-page layouts, error messages, or saving a complete app window. |
| Command + Shift + 4 | Captures a selected area | Grabbing a specific paragraph, image, or UI element without extra clutter. |
| Command + Shift + 4, then Spacebar | Captures a specific window | Snapping a clean shot of an entire application window with a professional-looking shadow. |
| Command + Shift + 5 | Opens the screenshot toolbar | Accessing advanced options like screen recording, timers, and changing the save location. |
These commands have been a core part of the Mac experience for years, evolving from basic functionality to the more robust toolset we have today. Ever since the macOS Mojave update back in 2018, hitting Command + Shift + 5 pulls up a powerful screenshot toolbar with even more options, including screen recording. If you want to dive deeper into the history or find more advanced commands, Apple's official documentation is a great resource.
Getting to Know the Screenshot Toolbar
While the basic shortcuts are great for a quick grab, the real power for taking a controlled screenshot on a Mac comes from the Screenshot Toolbar. You can bring up this little control panel by hitting Command + Shift + 5. Honestly, it's a game-changer. It turns you from someone just snapping pictures of their screen into a director with full control over the shot.
This small, floating bar gives you a whole set of tools that go way beyond a simple click-and-drag. You can still capture the entire screen, a specific window, or a custom area, but it also lets you start a screen recording of your whole display or just a selected part. This is incredibly handy for creating quick tutorials or showing a developer exactly how to reproduce a bug.
Fine-Tuning Your Capture with the Options Menu
The magic really happens inside the "Options" menu. This is where you can dial in your settings to solve common annoyances before they even start.
Tucked away in this menu are a few key settings I use all the time:
- Save Location: By default, macOS loves to dump every screenshot right onto your Desktop. You can change that here, sending them to a dedicated "Screenshots" folder or straight into a project folder to keep your workspace clean.
- Timer: Ever tried to screenshot a dropdown menu? It's a pain. The timer is the perfect solution. Set a 5 or 10-second delay, click to open the menu, and let the screenshot take itself.
- Show Floating Thumbnail: After you snap a shot, a small preview pops up in the corner. If you find that distracting, you can turn it off right here.
- Remember Last Selection: This is a lifesaver if you're taking multiple shots of the same area. It ensures every single capture is perfectly aligned and consistent.
Once you get comfortable with the Screenshot Toolbar, you stop just taking a screenshot on a Mac and start orchestrating it. Setting a timer or a specific save location ahead of time saves a ton of clicks and keeps you in your flow.
Think about it this way: say you're creating a guide for a new team member. You can set the save location to a shared project folder and turn on "Remember Last Selection" to capture the same part of the interface after each step. All your images end up uniform and exactly where they need to be, no cleanup required. That's the difference between a quick grab and a professional-looking asset.
Pro Tips for Next-Level Screenshots
Once you've got the basics down, a few lesser-known tricks can make a world of difference. These are the little keyboard modifiers that seasoned Mac users swear by to get that perfect, pixel-precise screenshot in a Mac without a single wasted click. Think of it as moving from a point-and-shoot to a DSLR—you get way more control.
A real game-changer is the Option key. After you hit Command + Shift + 4 to get the crosshairs, try holding down Option as you click and drag. You'll notice your selection now expands outward from the center, rather than from the corner. It's incredibly useful for grabbing things like circular user avatars or perfectly centered buttons.
Fine-Tuning Your Selection on the Fly
We've all been there: you start dragging a selection for your screenshot, and just as you're about to let go, you realize it's a few pixels off. Instead of sighing and starting over, just hold down the Spacebar without letting go of your mouse button.
This instantly freezes the size of your selection box, letting you drag the entire thing around the screen. Nudge it into the perfect position, release the Spacebar, and then you can continue resizing if you need to. It’s a tiny trick that saves a ton of time and frustration.
And if you're trying to capture just a single application window cleanly, our guide on how to screenshot a window on a Mac walks you through the absolute fastest way to do it.
Combining these two keys is where the real magic happens. Use Option to start a centered selection and the Spacebar to reposition it. This gives you a level of precision that makes your screenshots look like they were professionally edited.
Switching Up the Default File Type
By default, your Mac saves every screenshot as a PNG. That’s great for preserving quality, but the file sizes can add up, especially if you're taking screenshots all day for a project.
If you'd rather save space with a more compressed format like JPG, a quick trip to the Terminal is all it takes.
- Open the Terminal app (you can find it in Applications > Utilities).
- Carefully type this command and press Enter:
defaults write com.apple.screencapture type jpg
That's it. From now on, every screenshot you take will save as a smaller JPG file. Learning these small tweaks really lets you bend macOS to your will and tailor your workflow to exactly what you need.
Give Your Screenshots a Professional Makeover
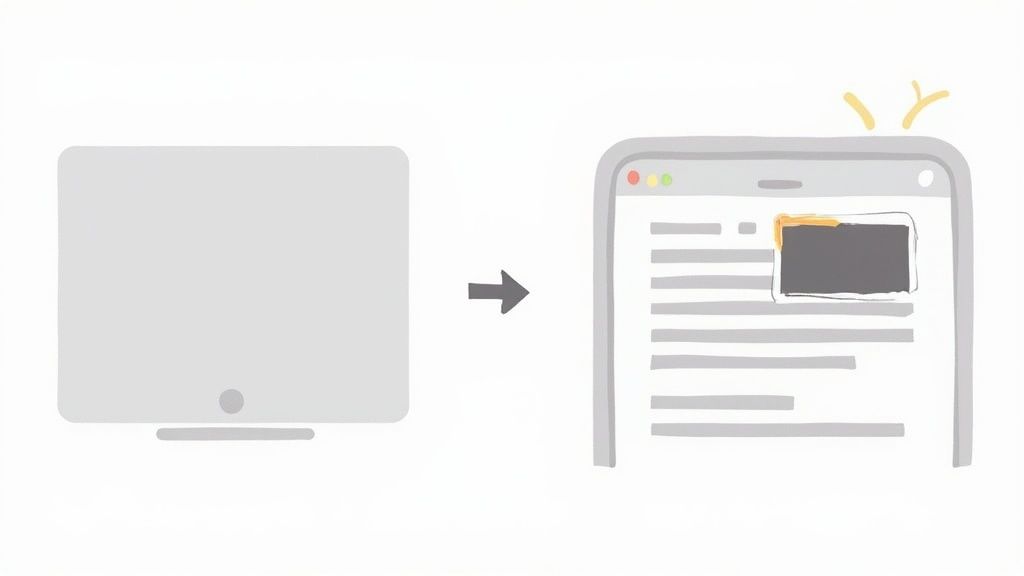
Taking a screenshot on a Mac is just the first step. A raw screen grab gets the job done, but to really make an impact, you need to give it some polish. This is where modern editing tools come in, transforming a basic image into something that looks sharp, professional, and ready to share.
Think about it. You're putting together a tutorial and need to highlight a specific feature in your app's UI. Instead of just dropping in a plain, flat screenshot, what if you could wrap it in a clean browser frame with a subtle, branded background? Or maybe you're sending a bug report to your dev team. You can quickly blur out sensitive customer data in one go instead of painstakingly redacting every single detail by hand. This is the kind of efficiency that AI-powered editors bring to the table.
It's All About the Presentation
Tools like GrabShot.io are built from the ground up for this exact purpose. They take your raw capture and instantly give it a professional sheen. You can add a device frame to show whether it's a mobile or desktop view, apply a soft drop shadow, or round the corners for a modern look. These small details make a huge difference in how your visuals are perceived.
Just look at how a simple screenshot gets an instant upgrade on the GrabShot.io website.
You can see how easy it is to add a stylish background and frame, turning a basic image into something you'd be proud to put in a presentation.
But it’s not just about looking good. These tools are packed with features that solve real problems for different roles:
- Marketers: Need to create visuals for social media? Use built-in presets to get the perfect dimensions for Twitter, LinkedIn, or your blog in seconds.
- Developers: Quickly add annotations, arrows, and frames to bug reports, giving your team the visual context they need to fix issues faster.
- Support Agents: Protect customer privacy with smart redaction that automatically hides personal info, like names and email addresses.
A great screenshot doesn’t just show something; it communicates something. Adding a simple frame or a clean background can be the difference between a confusing image and a clear, professional message that gets your point across instantly.
More Than Just Arrows and Text
Sure, the built-in macOS tools let you draw a circle or add some text, but a dedicated screenshot editing tool takes things to a whole new level. We're talking about features like automatic redaction that can find and blur every email address on the screen with a single click. This is a massive time-saver and helps you avoid embarrassing privacy slip-ups.
By adding a tool like this to your workflow, you stop just taking a screenshot on a Mac. You start creating polished, purpose-driven visuals that are ready for anything—from blog posts and tutorials to support tickets and marketing campaigns—without ever needing to open complex design software.
Keeping Your Screenshots Organized for a Clean Workflow
Let’s be honest, we’ve all seen it: a desktop absolutely buried under a mountain of files named "Screen Shot…" It's a classic sign of digital chaos and a real drag on productivity. While taking a screenshot on a Mac is incredibly simple, it's just as easy to let those files pile up until finding the one you need feels impossible.
The trick is to build a simple habit right from the start. Your first move? Stop saving screenshots directly to your Desktop.
Instead, create a dedicated folder just for these images—something simple like "Screenshots" works perfectly. Then, make that your new default save location. Just press Command + Shift + 5, click on "Options," and choose your new folder under the "Save to" menu. This one tiny change prevents clutter before it even has a chance to build up.
Use Your Mac’s Built-in Tools
You don't need fancy software to keep things tidy; your Mac already has some great features built right in.
One of my favorites is Stacks. If your desktop is already a mess, just right-click anywhere on the empty space and select "Use Stacks." Instantly, macOS will gather all your screenshots into a single, neat pile. It's like magic for a messy desktop.
Don't forget about Finder's powerful search, either. By default, every Mac screenshot is named with the exact date and time it was taken. This is a huge help, especially since research shows that around 65% of people never change the default file names. Need to find a capture from last Tuesday? Just search Finder for "Screen Shot" and the date.
Creating a dedicated folder and using Stacks shifts your process from reactive cleanup to proactive organization. It means you can always find the exact screenshot you need, right when you need it.
If you’re having trouble tracking down older captures, our guide on how to see screenshots on a Mac has a few more tricks up its sleeve. A little bit of organization goes a long way in keeping your workspace clean and your workflow smooth.
Got Mac Screenshot Questions? We've Got Answers
Even after you’ve mastered the basics, you’ll inevitably run into those little nagging questions when trying to capture the perfect screenshot on your Mac. Let's dig into some of the most common ones I hear all the time. Getting these details sorted will save you a ton of headaches later on.
First up, a problem I think everyone has faced: the dreaded desktop graveyard of random screenshot files. It’s a mess, but the fix is surprisingly easy.
Where Do My Screenshots Go?
By default, every single screenshot you take is dumped right onto your Desktop. While that's fine for a one-off capture, it gets out of control fast. The cleanest way to manage this is by using the Screenshot Toolbar.
Bring it up by pressing Command + Shift + 5. Look for the "Options" menu. In there, you'll find a "Save to" section where you can tell your Mac exactly where you want your captures to live. I highly recommend creating a dedicated "Screenshots" folder to keep everything organized. Once you set this, your Mac remembers it for good.
How Do I Screenshot Just the Touch Bar?
Here's one that many people don't even know exists. Your Mac has a dedicated shortcut just for capturing the Touch Bar, which is a lifesaver for anyone creating tutorials or documenting app functionality.
Just hit Command + Shift + 6. That's it. It instantly snaps a picture of whatever your Touch Bar is showing and saves it to your designated folder, just like any other screenshot.
A truly efficient workflow is less about taking the shot and more about knowing exactly where it is and how to find it. Setting a custom save location is probably the single best productivity hack you can do for your screenshot process.
Can I Change the Default File Format?
macOS saves screenshots as PNG files by default. PNGs are great for quality, but the file sizes can be chunky. If you're looking to save space, especially for web use, switching to JPG is a good idea. This requires a quick trip to the Terminal.
- First, open the Terminal app (you can find it in Applications > Utilities).
- Next, copy and paste this command exactly as it appears:
defaults write com.apple.screencapture type jpg - Finally, hit Enter.
The change is instant. From now on, every screenshot will be a smaller, more web-friendly JPG file.
Ready to take your raw captures and make them look polished and professional? With GrabShot.io, you can add beautiful backgrounds, realistic device frames, and even smart redactions in just a few clicks. Give GrabShot.io a try for free and see how simple it is to create stunning, share-ready assets.