
Editing a screenshot on a Mac is about so much more than just a quick crop. It's where you transform a basic screen grab into a powerful communication tool. The real magic happens after the capture—turning that raw image into something that clarifies instructions, highlights key data, or protects sensitive information with a professional touch.
Why Bother Editing Your Mac Screenshots?
Let's be honest, a raw screenshot is often just noise. It captures a moment, sure, but it usually lacks the context needed to make sense on its own. The real value comes out in the edit, where you can guide the viewer's eye and make your point impossible to miss.
In a world where we're all swimming in visuals, getting good at editing your Mac screenshots isn't just a neat trick; it's a vital skill for clear communication. Think about the last screenshot you sent to a coworker. Did it spark more questions than it answered? Good editing is what closes that gap.
From Simple Screen Grabs to Powerful Assets
A well-edited screenshot can be the difference between a head-scratching moment and an "aha!" moment. Here are a few places where a few intentional edits can make all the difference:
- Client Reports: Instead of just sending a raw data table, use arrows to point out the 25% growth in a key metric. A quick callout can explain why that number matters, focusing your client’s attention instantly.
- Bug Reporting: A developer can squash a bug way faster with a screenshot that has the glitch clearly circled, steps to reproduce it listed right on the image, and any user data blurred out for privacy.
- Customer Support Guides: When you create a tutorial, magnifying confusing icons or adding numbered steps directly onto the screenshots helps users help themselves. That means fewer support tickets and happier customers.
A thoughtfully edited screenshot respects your audience's time. By adding a few quick annotations, redacting sensitive info, or just cropping out the noise, you deliver a focused message that anyone can understand in seconds.
The Growing Need for Quality Visuals
The demand for better visual editing isn't just a feeling; the numbers back it up. The global photo editing software market was valued at $345.2 million in 2023 and is expected to hit $580.3 million by 2032. A big driver of this is the growing number of professionals using Macs, which are known for their creative-friendly ecosystem.
You can dig into the specifics in a full report on photo editing software trends. As more of us rely on Macs for our work, the need for fast, effective editing tools just keeps growing.
Your Mac Screenshot Editing Toolkit
To get you started, here’s a quick look at the go-to tools for editing screenshots on a Mac. This table highlights what they're best for so you can pick the right one for any task.
| Tool | Best For | Key Features |
|---|---|---|
| Markup (Built-in) | Quick, on-the-fly annotations right after taking a screenshot. | Arrows, text, shapes, drawing, and a simple signature tool. |
| Preview (Built-in) | More detailed edits like resizing, adjusting color, and redaction. | Comprehensive markup tools, image adjustments, and exporting formats. |
| GrabShot.io | Creating professional, shareable screenshots with advanced annotations. | Pixelation/blur, numbered steps, custom branding, and cloud sharing links. |
| Third-Party Apps (e.g., CleanShot X) | Power users who need an all-in-one workflow with cloud integration. | Scrolling captures, screen recording, advanced annotation, and team tools. |
Choosing the right tool depends on whether you need a quick fix or a polished, professional visual.
This guide will walk you through all the options your Mac offers, from the powerful tools already baked in to the best third-party apps out there. We’ll show you how to move beyond basic crops to create clear, purposeful, and effective screenshots every single time.
Mastering Instant Edits with Markup
The fastest way to edit a screenshot on your Mac is with the tool that pops up to greet you the moment you take one. That little thumbnail in the corner of your screen isn't just a confirmation; it’s your instant gateway to Markup, macOS's built-in tool for quick and effective annotations. Just click it, and you're immediately in a surprisingly powerful editing interface, ready to add clarity in seconds.
I think of Markup as my daily driver for visual communication. It’s perfect for those moments when you need to point something out, jot down a quick note, or blur sensitive info without the hassle of opening a full-blown photo editor.
Drawing Attention with Shapes and Arrows
Most of the time, we edit screenshots to guide someone's eye to a specific spot. Markup gives you a few tools for this, and knowing which one to use makes your message land so much better.
An arrow is direct and to the point. Use it to pinpoint a specific button, error message, or data point that is the single most important thing in the image. For example, when I’m filing a bug report, a sharp arrow aimed at a broken UI element tells a developer exactly where the problem is.
A rectangle or oval, on the other hand, is better for highlighting a broader area, like a paragraph of text or a cluster of icons. It says, "pay attention to this general region." I often use this to frame a section of a report I want a colleague to double-check.
Markup's "Shape Recognition" is a game-changer. If you draw a wobbly circle or a crooked line, just hold your mouse button or finger on the trackpad for a moment when you're done. macOS will magically snap it into a perfect, clean shape.
This one little trick makes your annotations look polished and professional instead of like a hasty scribble. It’s one of those small details that really elevates your work.
Adding Context with Text and Magnification
Sometimes, pointing isn’t enough. You need to add explicit instructions or zoom in on a tiny detail. This is where Markup's text and magnifier tools really shine.
The Text Tool is simple but surprisingly flexible. Click the "A" icon, and a text box appears, ready for you to type. You can easily change the font, size, and color to fit your needs. I constantly use this to add step-by-step instructions directly onto a series of screenshots when creating a quick training guide.
The Loupe (or Magnifier) tool is your best friend when the little things matter. Instead of just circling a tiny icon and hoping for the best, the magnifier blows it up while keeping the surrounding area visible for context. It's incredibly useful for showing a specific toggle in a crowded settings menu or a single pixel-level detail in a design mockup. You can even increase the zoom level by dragging the green dot.
For more advanced tips on screen captures, our guide on mastering screenshot selection on a Mac offers some great techniques.
Protecting Information with Redaction Tools
Sharing screenshots often means dealing with sensitive data, like personal info, client names, or financial figures. Just scribbling over text with the drawing tool is a bad idea—the original text can sometimes be recovered.
While Markup doesn't have a dedicated "redaction" button like some third-party apps, it offers a perfectly secure alternative. The best practice is to use the Shapes tool to draw a solid, filled rectangle over whatever you need to hide.
Here’s my go-to workflow for secure redaction:
- Select the rectangle shape from the toolbar.
- Click the Fill Color option (the solid square) and choose black or another solid color.
- Make sure the Border Color option (the empty square) is set to the same color or is transparent.
- Draw the rectangle directly over the sensitive information.
This method completely covers the pixels underneath, making it impossible to see what was there. Taking those few extra seconds to redact properly is a crucial step that protects you, your clients, and your company.
Unlocking Advanced Edits in the Preview App
While Markup is fantastic for quick, on-the-fly annotations, sometimes your screenshot needs a bit more polish. When you need to turn a simple screen grab into a professional-looking visual, it's time to open one of the most underrated tools on your Mac: Preview.
Most of us just think of Preview as a simple PDF or image viewer, but it's a hidden gem for more advanced editing. It packs a set of tools that perfectly bridge the gap between Markup's basic functions and the overwhelming complexity of a full-blown photo editor. It’s the logical next step for anyone who gets serious about their screenshots.
Fine-Tuning a Screenshot's Visuals
Ever take a screenshot that just looks… off? Maybe it's too dark, the colors seem washed out, or it just lacks punch. This happens a lot when grabbing content from videos or apps with odd color profiles. Thankfully, Preview’s Adjust Color tool is the perfect fix.
To find it, just open your screenshot in Preview, head up to the Tools menu, and click on Adjust Color.
You’ll see a panel with a few sliders that might look familiar if you’ve ever dabbled in photo editing. Here’s what they do:
- Exposure: Brighten up a dark, murky screenshot or tone down one that’s blown out.
- Contrast: Make the details pop by increasing the difference between the light and dark areas.
- Saturation: Give the colors a boost. This is great for making a bland screenshot look vibrant and engaging for a presentation.
- Temperature: Fix the color balance. You can warm up a shot that looks too blue or cool down one that looks too yellow.
Just a few small tweaks here can completely transform a lackluster image into a crisp, clear, and professional visual.
Isolating Elements with the Smart Lasso
One of Preview's most impressive and almost hidden features is the Smart Lasso. This tool lets you trace an object in your screenshot, and it intelligently snaps to the edges as you go, giving you a surprisingly clean selection.
Imagine you need to pull a company logo or a specific UI button out of a screenshot to use in a tutorial. The Smart Lasso is built for exactly that.
To get to it, click the Markup Toolbar icon (the little pen tip), then open the Selection Tools menu (the dotted rectangle) and choose Smart Lasso. From there, carefully trace around the element you want to grab. Once the selection is complete, just copy it (Command + C) and paste it wherever you need it.
The Smart Lasso is a game-changer for creating composite images. For instance, I've used it to grab an "Update Available" notification from one screenshot and paste it onto another to show a specific user action without having to perfectly time my screen capture.
This tool gives you a level of precision that a simple box selection just can't match, allowing for much clearer visual storytelling.
Batch Processing for Ultimate Efficiency
Manually resizing a dozen screenshots one by one for a blog post is mind-numbingly tedious. This is where Preview’s batch processing ability becomes a huge time-saver. You can resize an entire folder of screenshots all at once.
Here’s how you do it:
- Round up all the screenshots you need to process and put them in a single folder.
- Select all of them, right-click, and choose Open With > Preview.
- In Preview’s sidebar, select all the images (a quick
Command + Awill do the trick). - Go to the Tools menu and select Adjust Size.
- Enter your new dimensions (e.g., 1200 pixels wide), and watch as the changes are applied to every single image you selected.
This one feature alone can shave so much time off your workflow and ensures all your visuals are perfectly consistent.
Combining Screenshots into a Single PDF
When you're creating a step-by-step guide, you often end up with a series of screenshots. Instead of making someone click through a bunch of separate image files, you can use Preview to combine them into one clean, easy-to-follow PDF.
First, open the initial screenshot in Preview. Then, just drag the rest of your screenshots from Finder directly into the thumbnail sidebar in the Preview window. You can even reorder them by dragging the thumbnails up or down.
Once you’re happy with the sequence, go to File > Print. In the dialog box that appears, look for the PDF dropdown in the bottom-left corner and choose Save as PDF.
This little trick creates a professional, multi-page tutorial that's simple to share and a breeze for your audience to follow. It’s a pro move that makes your instructions far more user-friendly.
When It's Time to Look Beyond Built-In Tools
While the built-in macOS tools are surprisingly capable for quick grabs and edits, you'll eventually hit a wall. If you're constantly taking screenshots, collaborating with a team, or creating polished visuals for an audience, the native options start to feel clunky and slow. This is the moment a dedicated, third-party app stops being a "nice-to-have" and becomes a serious productivity tool.
These specialized apps are built to solve the very problems that the default tools ignore. Think instant cloud sharing, advanced annotation kits, pixel-perfect editing, and automated workflows that can genuinely save you hours.
This decision tree helps visualize when to stick with what you've got versus when it's time to upgrade for more demanding work.
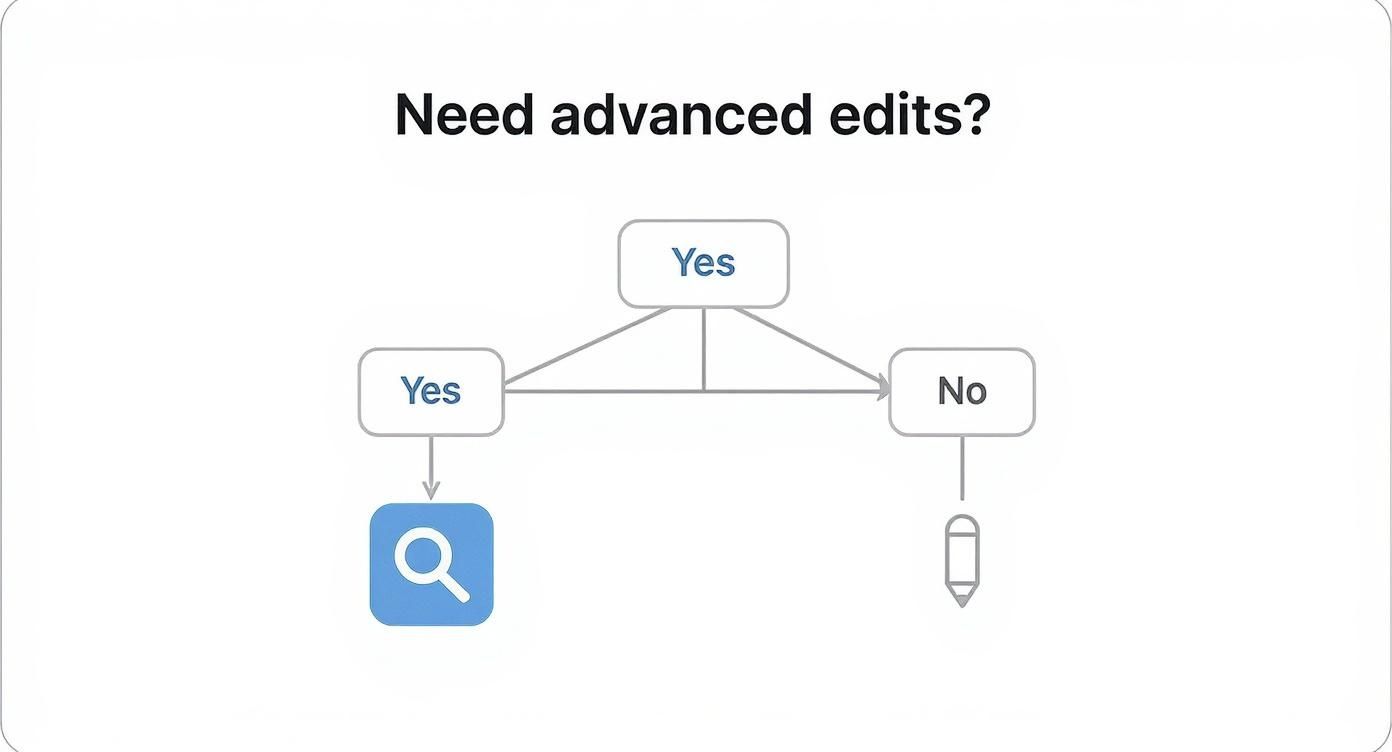
The takeaway is pretty clear: Markup is your best friend for quick, simple markups. Preview is great for more complex, one-off tasks. But when your needs get more professional and frequent, it's time to bring in the specialists.
For Instant Sharing and Team Feedback
One of the biggest drags with the native tools is just how many steps it takes to share something. You have to capture it, edit it, save it, find the file, and then finally upload it to Slack or Jira. For fast-moving teams, that friction really adds up.
This is exactly where a tool like GrabShot.io comes in. It's built for a world where speed and collaboration are non-negotiable. Instead of saving a file, it uploads your annotated screenshot straight to the cloud and puts a shareable link on your clipboard. Done.
Imagine a product manager spots a bug. They can grab a screenshot, add numbered steps to reproduce it, blur out sensitive user data, and drop the link into a ticket in less than 30 seconds. The dev team gets a crystal-clear visual with zero back-and-forth. That immediate feedback loop is something the built-in tools just can't touch.
The clean interface gives you professional tools like pixelation and numbered steps without feeling bloated or confusing.
For Creating Polished Instructional Content
If your job involves creating training guides, tutorials, or knowledge base articles, consistency is king. You need more than just a few arrows and text boxes; you need templates, brand consistency, and the ability to weave multiple steps into a single, cohesive guide.
Snagit has been the go-to for this kind of work for years, and for good reason. It excels at creating professional-looking instructional content. A course creator, for instance, can use its templates to make sure every screenshot in a module has the same branded border, color scheme, and font for callouts. Its "Simplify" tool is also a game-changer, letting you replace a cluttered user interface with clean shapes and text to focus the viewer's attention right where it needs to be.
The real magic of a tool like Snagit is its ability to turn a jumble of screenshots into a clear story. By combining captures and using consistent styling, you’re creating a guided experience, not just a folder of images.
Plus, its ability to capture long, scrolling webpages and record quick process videos makes it an all-in-one powerhouse for anyone in a support or education role. You can see how it stacks up against other options in our detailed breakdown of the best screenshot apps for Mac.
For Photoshop-Level Precision
Sometimes, a screenshot isn't just for communication—it's a key asset for a design project, a marketing campaign, or a high-fidelity mockup. In those cases, you need absolute, pixel-perfect control over every part of the image, from color correction to complex layering and retouching.
This is when you need to call in the heavy hitters like Pixelmator Pro or Affinity Photo. These are professional-grade image editors that let you:
- Remove unwanted elements like they were never there with content-aware fill tools.
- Make non-destructive edits using layers and masks, so you can always go back.
- Apply sophisticated color grading to match a specific brand look.
- Combine multiple screenshots into one polished, composite image.
The demand for this level of control is growing. The global photo editing software market is expected to hit $3.29 billion by 2032, and the "prosumer" segment—professionals and enthusiasts who need high-quality tools—is projected to make up 44.6% of that market by 2025. This shows a clear need for powerful but approachable apps like Pixelmator Pro that offer advanced features without the impossibly steep learning curve.
Ultimately, choosing a third-party app is all about spotting the bottlenecks in your current workflow. Whether you need more speed, more polish, or more power, there's a tool out there that can take your work to the next level.
How AI Is Making Screenshot Editing Smarter

The next big thing in screenshot editing is already here, and it's all about AI. These aren't just minor bells and whistles; artificial intelligence is truly changing how we edit screenshots on a Mac by automating the most tedious and mind-numbing tasks. Instead of spending minutes carefully tracing an object or painstakingly blurring out sensitive text, you can now do it all with a single click.
This is a bigger deal than just simple convenience. It’s about putting professional-grade editing tools into everyone's hands, no matter their design experience. The global photo editing software market was valued at $449.2 million in 2023 and is expected to hit $886.2 million by 2032. It's clear that the growth of the photo editing software market is being fueled by these smarter, AI-driven features.
Automating the Repetitive Stuff
Let's be honest, nobody enjoys the repetitive parts of editing. AI’s most immediate superpower is its ability to take that grunt work off your plate. Think about all the time you've sunk into manually removing a messy background or redacting private information pixel by pixel. AI-powered tools do these jobs in an instant, letting you focus on the actual story your screenshot is telling.
Here’s where it gets practical:
- Intelligent Background Removal: You grab a screenshot of an app, but your cluttered desktop is right there behind it. Instead of an awkward crop, AI can identify the main window and instantly make the background transparent. Perfect for dropping a clean element into a presentation or tutorial.
- Automatic Data Redaction: Manually blurring every name, email, or phone number in a screenshot is not only boring but also easy to mess up. AI can scan an image for patterns it recognizes as sensitive data—like credit card numbers or addresses—and hide them all at once. Privacy, handled.
- Smart Object Selection: Need to point out a specific button or icon? Old-school tools made you draw a precise box or circle around it. Now, AI can identify individual UI elements, letting you select, copy, or annotate them with just a click.
By taking over the tedious, pixel-level work, AI acts as a smart assistant, dramatically cutting down the time between capturing a screenshot and having a polished, shareable asset. What used to take ten minutes of careful clicking now takes about ten seconds.
Enhancing Visual Quality with a Click
Beyond just cutting out boring tasks, AI is also here to rescue your less-than-perfect screenshots. We've all been there: you grab a screenshot, but it's low-resolution or just looks blurry and unusable for any real work. AI upscaling algorithms can be a total lifesaver.
These tools analyze a low-res image and intelligently add new pixels to increase its size and sharpness, all without that blocky, artifact-filled look you get from traditional resizing. This means you can take a small, grainy screenshot and make it crisp enough for a high-resolution print or a keynote presentation on a massive screen.
Similarly, many tools now have "one-click enhancement" features. AI analyzes the image and instantly adjusts the brightness, contrast, and color balance to make a dull screenshot pop. It saves you from fiddling with a dozen different sliders. These smart features help you maintain a consistent, professional look across all your visuals. You can see this in action in any modern screenshot editing tool that has baked in these kinds of AI capabilities.
The Future Is Effortless Editing
Ultimately, the goal of AI in screenshot editing is to remove friction. It’s about making the process so smooth and intuitive that you create fantastic, informative visuals without ever feeling like you’re "editing." As this tech becomes standard in more Mac apps, the line between a raw capture and a finished, polished image will practically disappear.
For anyone who relies on screenshots to communicate—from developers filing bug reports to marketers creating how-to guides—this is a huge leap forward. It levels the playing field, giving everyone the ability to produce visuals that are not just clear, but genuinely professional-looking, with almost no effort.
A Few Lingering Questions About Mac Screenshots
Alright, we've covered a ton of ground on capturing and editing screenshots. But even with all the tools at your disposal, a few common questions always seem to pop up. These are the practical, everyday things that can trip you up and slow you down.
Let's tackle a few of the most frequent ones I hear. Getting these details sorted will make your workflow so much smoother.
How Can I Change the Default Screenshot File Type?
By default, your Mac saves every screenshot as a PNG. PNGs are fantastic for quality, but their file sizes can be chunky. If you're taking lots of screenshots for a blog post or just want to save some disk space, switching to a JPG is often a better bet.
You don't need a special app for this, just a quick trip to the Terminal. Open it up, paste in the following command, and hit Enter:
defaults write com.apple.screencapture type jpg
You'll need to log out and back in (or just restart your Mac) for the change to stick. From then on, all new screenshots will be saved as smaller JPEGs. Want to go back to PNGs? Just run the same command, swapping "jpg" with "png". Simple.
Is There a Way to Screenshot the Touch Bar?
Yes, and it’s a lifesaver if you ever need to create a tutorial or show someone the custom controls on your MacBook Pro. Capturing what's on your Touch Bar is built right into the system.
The magic shortcut is Shift-Command-6.
Hit that combo, and macOS will drop a long, skinny image of your Touch Bar right onto your desktop. No fuss, no extra steps.
What’s the Best Way to Stop Screenshots from Cluttering My Desktop?
A messy desktop is a productivity killer. Instead of letting your screenshots pile up and then dragging them into a folder later, you can tell your Mac where to put them from the get-go.
Bring up the screenshot toolbar with Shift-Command-5. See that "Options" button? Click it. In the "Save to" section, you can pick a new home for your captures, like the Documents folder or a dedicated "Screenshots" folder you’ve already made.
Pro Tip: Setting a default save location is one of the best habits you can form. It transforms a chaotic mess into an organized system, and you’ll never have to hunt for a specific screenshot again.
Can I Still Edit a Screenshot After I’ve Saved It?
Of course. Nothing is set in stone just because you closed the editing window. Need to tweak a screenshot you took last week? No problem at all.
Find the image file in Finder, right-click it, and go to "Open With." From there, just choose Preview. This reopens the image with all the same powerful tools we covered earlier—shapes, text, color adjustments, you name it. You can add new annotations or even adjust the ones you made before.
If you're looking for a workflow that blends powerful editing with instant sharing, you should really check out GrabShot.io. It helps you turn a simple capture into a polished, professional visual in seconds, with smart features like AI enhancements and automatic redaction. Start creating better screenshots over at https://grabshot.io.