
So, you've hit a wall. You need to grab a screenshot, but your keyboard is missing the classic Print Screen button. Don't worry, you're not alone. Many modern keyboards, especially the sleek, compact ones on laptops, have done away with that dedicated key to save space.
The good news? The built-in tools on your computer are actually far more powerful and flexible than a single button press ever was. Once you get the hang of a few simple keyboard shortcuts, you'll wonder why you ever needed that key in the first place. This guide will show you how to turn that missing key into a workflow superpower.
So, What's the Best Way to Take a Screenshot?
The right method really comes down to your operating system and exactly what you're trying to capture. Are you on a PC or a Mac? Do you need the whole screen, just one window, or a very specific area?
This handy visual breaks down the best paths to take on either system.

As you can see, both Windows and macOS have their own set of shortcuts, each designed for a different kind of screen capture.
It's interesting how the Print Screen key has evolved. Back in the early 1980s, it did exactly what its name implies: it sent the text on your screen directly to a printer. Today, its function is to copy an image to your clipboard. With modern keyboards shrinking, relying on shortcuts has become the norm. In fact, data shows that over 90% of Windows users already prefer using keyboard shortcuts for common tasks because they're simply faster. Some power users even remap their keyboards with tools like Microsoft's PowerToys for ultimate control. For a deeper dive, check out this fascinating history of the Print Screen key on How-To Geek.
Quick Guide to Built-In Screenshot Methods
To help you find the right tool quickly, here’s a simple breakdown of the best built-in options for both Windows and macOS. This table makes it easy to compare them at a glance.
| Method | Operating System | Best For | How to Access |
|---|---|---|---|
| Snipping Tool / Snip & Sketch | Windows | Making precise selections, adding annotations, and sharing instantly. | Windows Key + Shift + S |
| macOS Screenshot Utility | macOS | Capturing the full screen, a single window, or a custom area with one tool. | Cmd + Shift + 5 |
| Full-Screen Grab (macOS) | macOS | Instantly saving an image of your entire screen directly to your desktop. | Cmd + Shift + 3 |
| Selected Area (macOS) | macOS | Quickly dragging a box around exactly what you want to capture. | Cmd + Shift + 4 |
Think of this as your starting point. Now, let's explore how to master these tools and make screen captures an effortless part of your day.
Getting to Know Windows Screenshot Tools Like Snip and Sketch
If you're on a Windows machine, don't sweat a missing Print Screen button. Honestly, you're not missing much. The built-in tools like the classic Snipping Tool and its much-improved successor, Snip & Sketch, give you a level of control that a single key never could. These tools are made for how we actually work today—grabbing specific pieces of information, not just the whole screen.
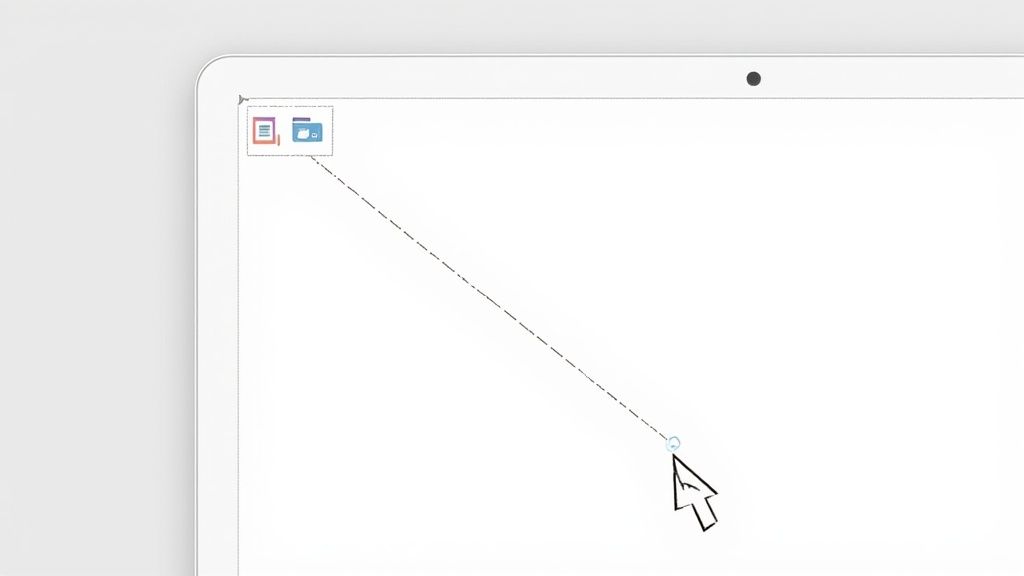
The quickest way to jump in is with a keyboard shortcut I use dozens of times a day: Windows Key + Shift + S. The moment you press it, your screen will dim, and a small toolbar appears at the top, ready for action.
Picking the Right Capture Mode for the Job
This isn't a one-size-fits-all situation. Each capture mode is designed for a specific task, and knowing which one to use can make a real difference in your workflow.
- Rectangular Mode: This is my default for almost everything. Picture this: you're looking at a huge spreadsheet and need to send just one chart to a coworker. Just click and drag a box around that chart. Done. It's now on your clipboard.
- Freeform Mode: This one is perfect for when you need to grab something with an awkward shape. Maybe you're a designer pulling inspiration from a website and want to snag a unique logo without all the background noise. Freeform lets you trace around it precisely.
- Window Mode: I use this all the time for creating clean documentation. If you need to capture a single application window without showing your cluttered desktop or other open apps, just hover over it and click. You get a perfect, clean shot of just that window.
- Fullscreen Mode: And of course, there's the classic. This does exactly what the old Print Screen button did—captures every pixel across all your monitors.
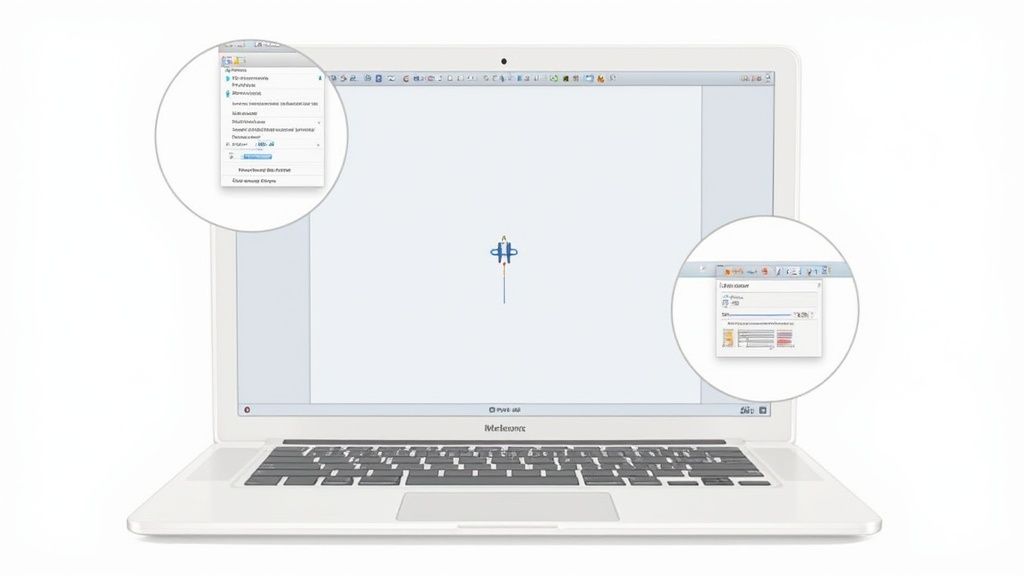
This image shows the interface for the old Snipping Tool. It might look a little dated next to the sleeker Snip & Sketch, but it's the tool that introduced this whole idea of mode-based screen captures.
It really set the stage for how intuitive it is to learn how to print screen without a button on modern Windows systems.
More Than Just a Capture
The real magic happens right after you take the snip. As soon as you make your selection, the image is automatically copied to your clipboard. You can immediately paste it (Ctrl + V) into a Slack message, an email, or a Google Doc. It's incredibly fast for on-the-fly sharing.
At the same time, a little notification will pop up in the corner of your screen. Don't ignore it—that's your gateway to more powerful features.
Clicking that screenshot notification is the key. It opens your capture in the Snip & Sketch app, where you can instantly mark it up, crop it, and save it. This is what turns a simple screen grab into a clear piece of communication.
Once you're in the app, you have a handy set of editing tools. You can grab a pen to circle an important number, use the highlighter to draw attention to a line of text, or even use the ruler to draw perfectly straight lines. Think about reporting a bug to your IT team—instead of trying to describe where the error message is, you can just circle it directly on the screenshot.
When you're finished, you can save the file right to your hard drive or use the built-in share feature to send it to another app. It’s a smooth, integrated process that makes you wonder why we ever needed a dedicated Print Screen key in the first place.
Effortless Screen Captures on Your Mac
If you're a Mac user, you've probably heard people talk about the "Print Screen" key and wondered what all the fuss was about. The truth is, macOS never needed one. Apple baked a powerful and flexible screenshot system right into the operating system, built around intuitive keyboard shortcuts.
Forget hunting for a single, clunky key. The Mac approach uses simple, memorable combinations that give you far more control.
The Instant Full-Screen Capture
Need a quick snapshot of your entire desktop? The go-to command is Cmd + Shift + 3.
As soon as you press this combo, you'll hear that satisfying camera shutter sound. An image file of everything on your screen instantly lands on your desktop, ready to go. It’s the fastest way to document exactly what you’re seeing at any given moment.
Precision Captures with a Crosshair
Most of the time, though, you don't need the whole screen. You just want a specific chart, a paragraph of text, or a single image. For that, Cmd + Shift + 4 is your best friend.
This command instantly transforms your cursor into a set of crosshairs. Just click and drag a box around the exact area you want to save. When you let go, only your selection is saved as an image. Simple.
Pro Tip: My absolute favorite trick is hidden inside this shortcut. After hitting Cmd + Shift + 4, don't drag anything. Instead, tap the spacebar. Your cursor will change into a little camera icon. Now you can just click on any open window to capture it perfectly, complete with a clean, professional-looking drop shadow.
I use this all the time for creating visuals for tutorials or reports. It isolates the window without showing my messy desktop in the background.
The All-in-One Screenshot Toolbar
For the highest level of control, Apple gives you a full-blown screenshot utility. You can pull it up with Cmd + Shift + 5.
This single shortcut brings up a small control panel at the bottom of your screen, which is basically the command center for all your screen capture needs.
From this little toolbar, you can do a lot:
- Capture the Entire Screen: A simple one-click option.
- Capture a Selected Window: Lets you click on any app window, just like the spacebar trick.
- Capture a Portion of the Screen: Lets you draw a precise rectangle for your shot.
- Record the Entire Screen: Yes, there's a built-in screen recorder for making quick video tutorials.
- Record a Portion of the Screen: You can even record video of just a specific area.
What’s more, the "Options" menu on this toolbar lets you set a timer (perfect for grabbing menus that otherwise disappear), change the save location from your desktop to another folder, and even choose whether or not to show the mouse pointer in your capture. It’s a complete system that makes a dedicated Print Screen key feel totally unnecessary.
Upgrading Your Workflow with Third-Party Screenshot Apps
While the built-in screenshot tools on Windows and Mac get the job done for quick grabs, they’re just the tip of the iceberg. If you find yourself taking screenshots regularly for work, you'll quickly hit their limitations. Dedicated third-party apps are where the real power lies, transforming a simple screen capture into a full-fledged communication and productivity tool.
This is more relevant than ever, especially as keyboard layouts have changed. Think about it: most modern laptops have ditched the classic, spacious keyboard design. In fact, back in 2020, laptops with compact keyboards—often missing a dedicated Print Screen key—accounted for over 70% of new sales. This hardware shift means getting comfortable with alternative screenshot methods isn't just a "nice-to-have," it's essential. If you want to dive deeper into this trend, iSunShare has a great breakdown on the evolution of keyboards.
Why a Dedicated App Might Be for You
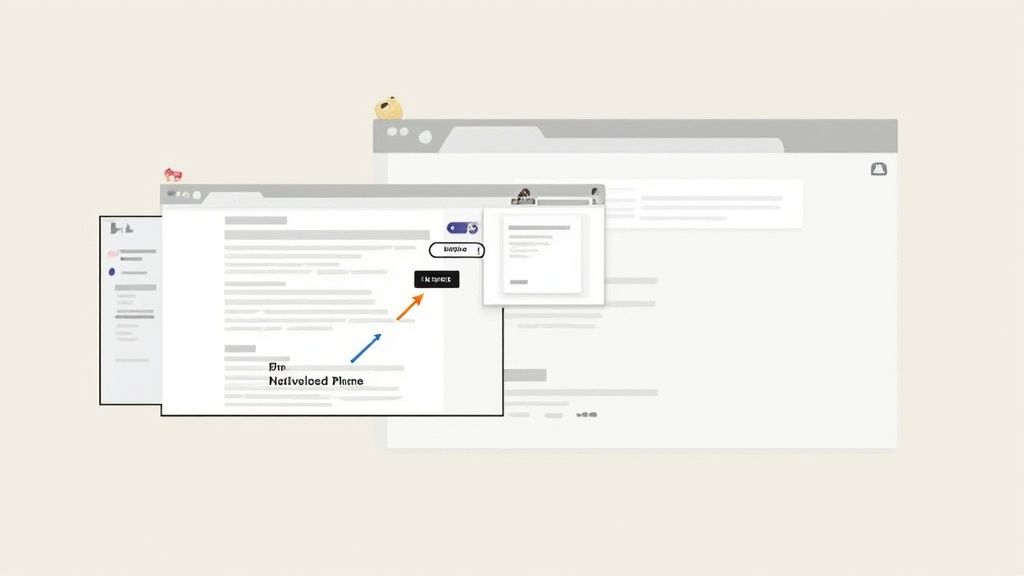
The real magic of third-party screenshot apps is how they streamline your entire workflow. They combine capturing, editing, and sharing into one fluid motion, saving you clicks and headaches.
Let's say you're a support agent trying to walk a customer through a fix. Instead of taking a screenshot, opening it in Paint, clumsily drawing arrows, saving it, and then finally attaching it to an email, you could use an app like Lightshot. With a single keyboard shortcut, you can capture a section of your screen, add numbered steps and highlights directly on the capture, and get a shareable link instantly copied to your clipboard. Problem solved in seconds.
Or maybe you're a content creator who needs visually stunning images for a blog post. This is where a tool like GrabShot.io shines. It's built specifically to turn bland screen captures into polished, professional-looking graphics.
You can instantly add stylish backgrounds, soft shadows, and rounded corners, making your screenshots look like they were designed by a pro.
The whole process is incredibly intuitive, letting you create beautiful assets for your content without ever leaving the app.
Key Features That Set Them Apart
So what exactly makes these tools worth installing? It’s all about the features that tackle common pain points and speed up your work.
- Instant Cloud Sharing: This is a huge one. Take a screenshot and immediately get a short URL to paste into Slack, Trello, or an email. It’s perfect for fast-paced team collaboration.
- Scrolling Capture: Ever tried to screenshot a long webpage and had to stitch multiple images together? Apps with scrolling capture let you grab the entire page—from top to bottom—in one clean shot.
- Advanced Annotation: We're talking way beyond basic arrows and text boxes. You can add numbered steps for tutorials, blur out sensitive information like names or account numbers, or even use a magnifier tool to zoom in on a critical detail.
- Workflow Automation: Power users, this one’s for you. A tool like ShareX lets you build custom "after capture" tasks. Imagine hitting one hotkey that captures a region, adds a watermark, uploads it to your Google Drive, and copies the link to your clipboard. That's the kind of efficiency we're talking about.
Ultimately, these apps do more than just replace a missing Print Screen key. They build a smarter, faster system for visual communication and turn a simple utility into a genuine productivity booster.
When it comes to choosing the right tool, it's all about what you need to accomplish. Below is a quick comparison to help you find the best fit for your workflow.
Feature Comparison of Top Screenshot Tools
Here’s a detailed look at how some of the most popular third-party screenshot apps stack up against the tools that come with your operating system.
| Tool | Key Feature | Best For | Price |
|---|---|---|---|
| Native OS Tools | Basic capture & simple markup | Quick, simple screen grabs | Free |
| Lightshot | Instant sharing & simple annotation | Fast team collaboration & support | Free |
| ShareX | Advanced workflow automation | Power users needing customization | Free |
| GrabShot.io | Professional beautification tools | Content creators & marketers | Freemium |
Choosing the right app really comes down to your primary use case. If you just need a quick grab, the native tools are fine. For lightning-fast sharing with your team, Lightshot is fantastic. If you want to automate every aspect of your capture workflow, ShareX is in a league of its own. And for anyone creating content that needs to look sharp and professional, GrabShot.io offers the perfect suite of design-focused features.
Advanced Tips and Troubleshooting Common Issues
So, what do you do when your go-to screenshot shortcut just stops working? Or when you're trying to capture something tricky, like a right-click menu that vanishes the moment you move your mouse? It’s a frustrating spot to be in, but the fix is usually simpler than you think. This section is all about getting you past those hurdles.
Even the most reliable methods can hit a snag. Knowing your way around a few common issues is a huge part of mastering how to print screen without button for good.
Often, the problem isn't your computer at all, but another program getting in the way. Some applications—think streaming services, certain video games, or security software—run an overlay that can block screenshot tools from actually "seeing" what's on your screen.
From my experience, the number one reason screenshot shortcuts fail is because another program has already claimed that key combination. Always check for software running in the background, especially cloud storage apps like OneDrive or other capture utilities that may have set their own hotkeys.
Solving Common Screenshot Roadblocks
If your shortcuts aren't responding, don't panic. Before you start digging through system settings, run through these quick checks. They solve the problem over 80% of the time.
- Look for conflicting software. Start closing any non-essential applications one at a time, testing your shortcut after each one. You’ll often find a single program was intercepting the command.
- Update your system. It's always a good idea to make sure your Windows or macOS is fully updated. A known bug interfering with native tools could have already been fixed in a recent patch.
- Restart your computer. I know, it’s the classic IT advice, but a simple reboot can clear up countless minor glitches that might be gumming up the works.
If those first steps don’t get you back on track, you might need to look a little closer at your system settings to make sure nothing was accidentally disabled.
Capturing Difficult On-Screen Elements
Some things on your screen are just plain stubborn. Login screens, pop-up context menus, and full-screen games have a knack for blocking standard capture methods. Here’s how to outsmart them.
For capturing something like a right-click menu that disappears when you click elsewhere, the delay or timer feature is your best friend. This is built into tools like the macOS Screenshot utility (Cmd + Shift + 5) and third-party apps like ShareX. Just set a 5-second timer, pop open the menu you need to capture, and let the tool grab the shot for you.
When it comes to capturing login screens or other secure desktops, the usual Windows Key + Shift + S shortcut might not be an option.
In that case, a fantastic workaround is the On-Screen Keyboard.
- Open your Start Menu and search for "On-Screen Keyboard."
- Navigate to the exact screen you want to capture.
- On the virtual keyboard, simply click the "PrtScn" key. This copies a full screenshot to your clipboard, ready to be pasted and saved. It's a lifesaver when all else fails.
Your Screenshot Questions Answered
Ditching the Print Screen key is liberating, but it can definitely lead to some head-scratching moments. When your go-to shortcut suddenly stops working or you can't figure out how to save a file just right, it can throw a wrench in your workflow. I've been there.
Let's walk through some of the most common questions people have when they switch up their screenshot routine. These are the quick fixes and practical answers you need to get back on track.
Why Did My Screenshot Shortcut Stop Working?
It’s one of the most maddening tech issues: one day, Windows Key + Shift + S or Cmd + Shift + 4 is your best friend, and the next, it does absolutely nothing. So what gives?
Nine times out of ten, another app has hijacked your shortcut. This is a classic case of software fighting for control. Often, the culprit is a cloud storage service like OneDrive or another screen capture tool you installed ages ago and forgot about. The first thing you should do is check the apps running in the background. Dig into their settings for anything related to "hotkeys" or "screen captures" and you'll likely find the conflict.
How Can I Save My Screenshot as a JPG or PNG?
By default, most systems save screenshots as a PNG file. It's a great format, but sometimes you need a JPG. The good news is that you're never locked into the default format.
-
For Windows users: After you hit
Windows Key + Shift + Sto capture your screen, a small notification pops up. Click it. This opens the Snip & Sketch editor. From there, just click the "Save" icon, and in the dialog box that appears, you’ll find a "Save as type" dropdown. Simply choose JPG, PNG, or even GIF. -
For Mac users: When your screenshot appears on the desktop, open it. Head up to the "File" menu in the top menu bar, click "Export," and you'll see a list of formats to choose from. It’s that easy.
The key takeaway here is that you always get a chance to change the file type after the capture. This is a fundamental skill for anyone learning how to print screen without button, giving you total control over the final image.
Can I Take a Screenshot on a Login Screen?
This is a great question, and the answer is yes, though your normal methods won't work. For security reasons, Windows locks down most shortcuts on screens like the login or User Account Control prompt.
The clever workaround is to use the On-Screen Keyboard. From the login screen, look for the Ease of Access icon. Click it, launch the On-Screen Keyboard, and you'll see a virtual "PrtScn" key. Clicking this will copy the entire screen to your clipboard. Once you log in, you can paste it into Paint or your favorite image editor. It’s a handy trick for those rare moments when you need to capture a system screen.
Ready to stop wrestling with basic screenshot tools and start creating beautiful, professional-looking visuals in seconds? GrabShot.io is a browser-based tool that turns your screen captures into polished assets perfect for blogs, social media, or tutorials. Add stunning backgrounds, perfect shadows, and automatically redact sensitive information with a single click. Try GrabShot.io for free and see the difference.