

Ever taken a screenshot on your Mac only to have it disappear into thin air? It's a frustratingly common problem, but the fix is usually simple. By default, macOS saves every screenshot you take right onto your Desktop.
Look for files named something like 'Screen Shot [date] at [time].png'. That's your first and best clue.
Your Instant Guide to Finding Screenshots on a Mac
It happens to the best of us—you capture the perfect image, a snippet of an important email, or an error message, and then… it's gone. Let's walk through the fastest ways to track down those missing captures, so you can spend less time searching and more time doing.
The Desktop: Your Screenshot Home Base
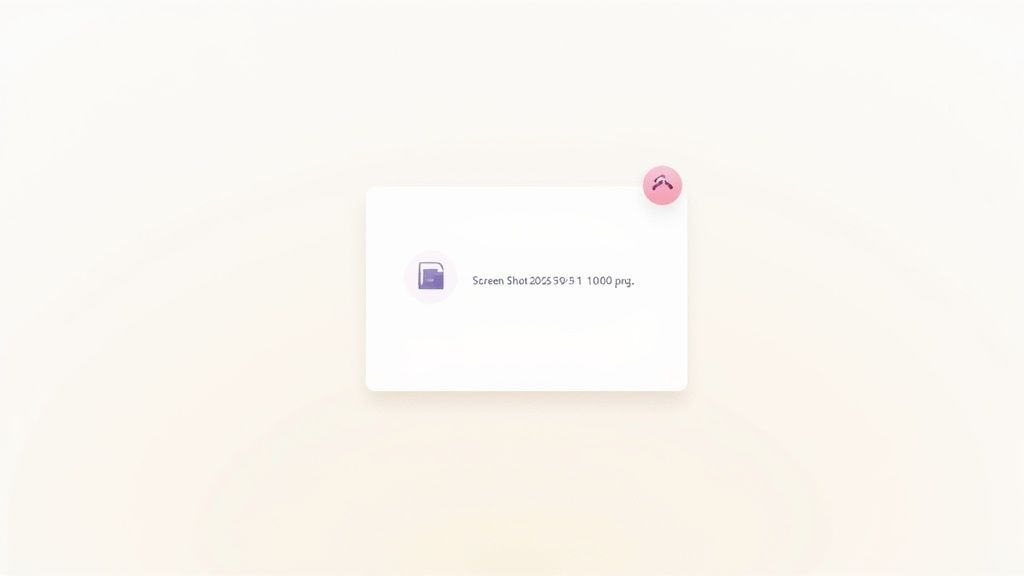
More often than not, your missing screenshot is sitting right on your Desktop. It’s the default spot macOS uses, so always check there first. The predictable naming convention makes the files easy to spot, even on a cluttered background.
The Screenshot App: Your Control Center
For a more powerful approach, get familiar with the native Screenshot app. Many people don't even realize it's there!
You can summon it instantly with the keyboard shortcut Cmd + Shift + 5. Alternatively, hit Cmd + Space to open Spotlight and just type "Screenshot." This tool not only helps you capture new images but also displays a handy thumbnail of your last shot, which you can click to edit or share immediately.
Pro Tip: See that little thumbnail that pops up in the bottom-right corner after you take a screenshot? Don't ignore it. You can actually click and drag that preview directly into an email, a message, or a Finder folder. It's a huge time-saver.
Mastering these two methods—a quick glance at the Desktop and a tap of Cmd + Shift + 5—will solve the "where did my screenshot go?" mystery 9 times out of 10.
For a quick reference, here are the fastest ways to get eyes on your screenshots.
Quickest Ways to View Your Mac Screenshots
This table breaks down the most efficient methods for locating any screenshot on your Mac.
| Method | How It Works | Best For |
|---|---|---|
| Check the Desktop | Simply navigate to your Mac's Desktop. Screenshots are saved here by default with a timestamped name. | Quickly finding any recently taken screenshot without opening any apps. |
| Use the Screenshot App | Press Cmd + Shift + 5 to open the app. The toolbar shows a thumbnail of the last capture. | Accessing options, making quick edits, or finding the most recent shot. |
| Use Spotlight Search | Press Cmd + Space and type "screenshot". It will show recent screenshot files in the results. | When you know part of the file name or can't find it on the Desktop. |
Having these simple techniques in your back pocket turns a moment of panic into a quick, confident action every time.
Getting a Handle on Where Your Screenshots Live
If you've ever taken a screenshot on a Mac, you know the drill: it almost always lands right on your Desktop. This isn't random; Apple designed it this way for pure convenience. The idea is to make your fresh capture immediately visible and accessible, ready to be dragged straight into an email, a Slack message, or a presentation.
On top of that, macOS keeps things organized with a consistent naming system. Every file starts with "Screenshot," followed by the exact date and time it was taken. This little detail is a lifesaver when you're trying to find a specific capture from last Tuesday—just sort by date, and you're golden.
Using Finder to Track Down a Missing Screenshot
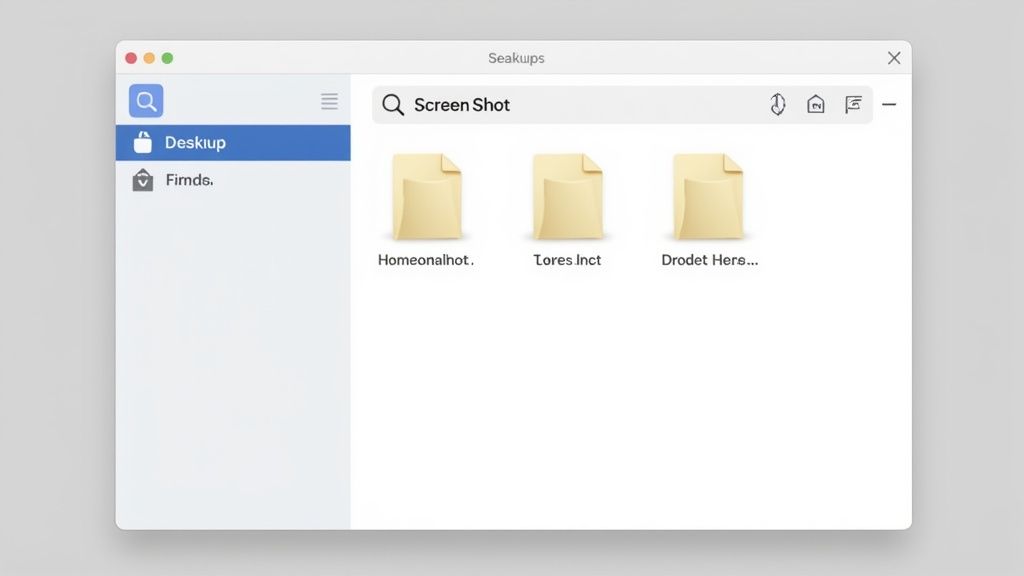
But let's be real, screenshots don't always stay on the Desktop. We move them, file them away, and promptly forget where we put them. When that happens, Finder is your best friend.
Instead of hunting through folders one by one, just open a new Finder window and pop "Screenshot" into the search bar. This simple query will scan your entire system and pull up every file with that word in its name, which usually solves the problem in seconds.
The Power-User Trick: Searching With Metadata
What if you've renamed the file? Now a simple name search won't work. This is where a more advanced trick comes into play. Every screenshot you take on a Mac is tagged with a piece of invisible metadata that identifies it as a screen capture, regardless of its filename.
You can search for this specific tag.
In the Finder search bar, type kMDItemIsScreenCapture: 1 and hit Enter. This command tells your Mac to show you every single screenshot on your system, even those you've renamed. It's the most foolproof method for finding any capture, ever.
This technique is my go-to when I'm doing a big file cleanup or trying to locate an old, renamed image. It cuts right through the noise and looks at the file's core identity. Once you get the hang of these default settings and search tools, you’ll never lose a screenshot again.
How to Change Your Screenshot Save Location
If you take a lot of screenshots, you know the struggle: a desktop that slowly but surely gets buried under a mountain of PNG files. It’s a digital mess that makes finding anything a chore. The good news is that you can easily reclaim your desktop by telling your Mac exactly where to save those captures.
This one simple tweak can make a huge difference in your workflow, keeping your main workspace clean and your screenshots neatly organized in one place.
The Easiest Fix: Using the Screenshot App
The quickest way to redirect your screenshots is right inside the built-in Screenshot app itself.
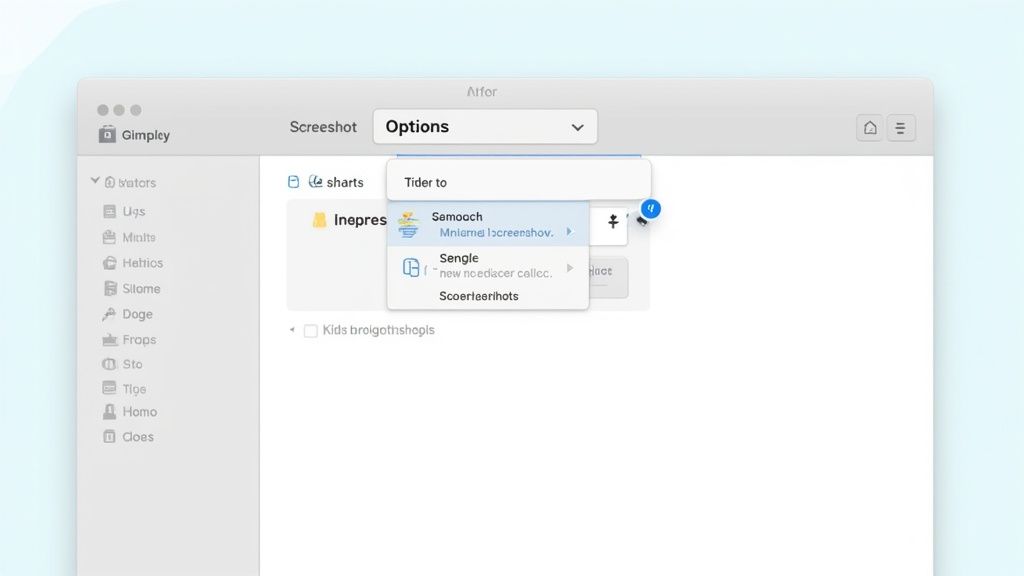
First, bring up the screenshot toolbar by hitting Cmd + Shift + 5. You’ll see a control panel appear at the bottom of your screen. From there, just click on the Options menu.
This menu is command central for all your screenshot settings. Look for the "Save to" section, where you can pick a preset spot like Documents or even send it straight to your Clipboard. For the best organization, I always recommend choosing Other Location and then creating a new, dedicated folder. Personally, I have a folder called "Screenshots" right in my Documents folder—it keeps everything out of sight but easy to find.
Here's exactly what that menu looks like:
Once you set this, every single screenshot you take from now on will automatically land in that folder. No more digital clutter.
Advanced Organization Tips
Once you've got a dedicated folder, why not take it a step further? A little more structure can save you a ton of time later.
- Subdivide and Conquer: Inside your main screenshots folder, try making subfolders for different projects or clients. Think "Q4 Marketing Reports" or "Website UI Mockups." When you need to find a specific image weeks later, you'll know exactly where to look.
- A Quick Tip for Terminal Users: If you're comfortable in the command line, you can also change the save location with a quick Terminal command. While using the Cmd + Shift + 5 menu is far more intuitive for most people, Terminal is a great option for power users who want to script this kind of setup.
Spending a minute now to create a dedicated folder isn't just about tidying up. It's about building a system that prevents future headaches. This small habit has a massive impact, saving you from ever having to sift through a chaotic desktop again.
Using Advanced Search to Find Any Screenshot
Let’s be real—we’ve all been there. You drag a screenshot into some obscure project folder, change the default save location on a whim, or just plain lose track of a capture you took last week. When your desktop is clean but your screenshot is missing, it's time to bring in the big guns: Spotlight and Finder.
Instead of just typing "screenshot" into the search bar, you can get much smarter. Open up a Finder window and in the search bar, type Kind:Screen Shot. This isn't just a keyword search; it’s a specific command that tells your Mac to find files based on what they are, not what they’re named. It instantly filters out everything else and shows you every single screen capture, no matter where it's hiding.
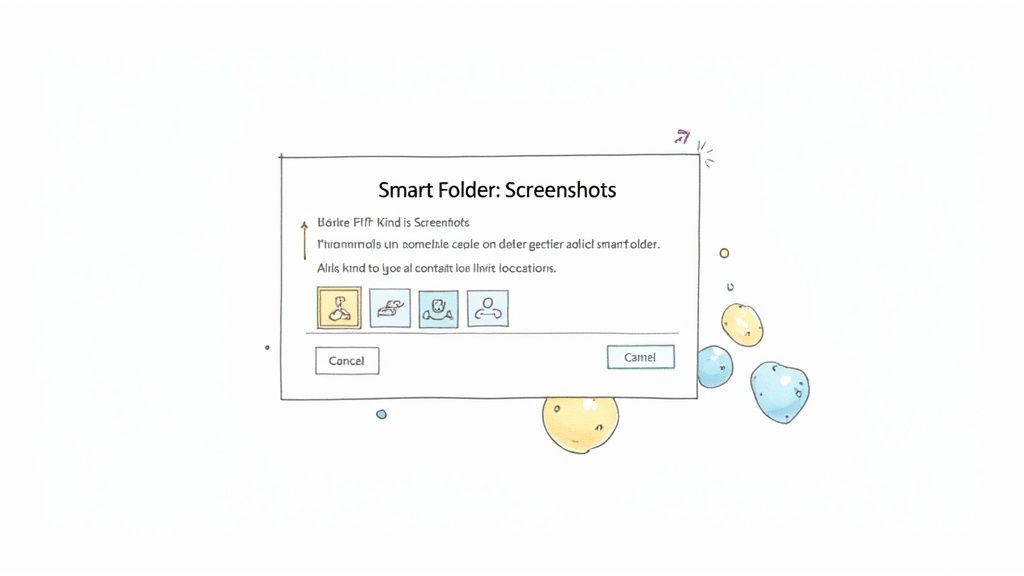
Create a Dynamic Smart Folder
If you find yourself hunting for screenshots often, here’s a pro tip that will change your workflow: create a Smart Folder. This isn't a typical folder where you store files. It's a saved search that automatically and continuously gathers every screenshot on your Mac into one place.
Setting it up is a one-time thing that pays off forever.
- First, open a new Finder window and just click in the search bar.
- Look for the little “+” button just below the search bar and click it to add a search rule.
- You'll see a couple of dropdown menus. Change the first one from "Name" to "Kind" and the second one to "Screen Shot".
- Finally, hit the "Save" button in the top-right corner.
Name your new Smart Folder something intuitive like "All My Screenshots" and—this is key—check the box for "Add to Sidebar".
Now, you’ll have a permanent, dedicated folder in your Finder sidebar that acts as a live feed of every screenshot on your system. It’s the ultimate shortcut. No more frantic searching before a deadline; they're all right there, neatly collected.
This little trick transforms a frustrating hunt into a simple click. It’s hands-down the most efficient way to see all your screenshots on your Mac, turning digital chaos into organized clarity.
Troubleshooting Common Screenshot Issues
Even a simple, everyday task like taking a screenshot can hit a snag. One minute you’re capturing exactly what you need, and the next, the keyboard shortcut does nothing. It's a frustrating interruption, but don't worry—most of these glitches are surprisingly easy to fix.
Before you dive into settings, try the oldest trick in the book: just restart your Mac. It’s amazing how often a quick reboot clears up the minor software conflicts that cause features like screenshotting to stop working. If that doesn't do the trick, your next stop should be your keyboard settings.
Are Your Keyboard Shortcuts Still Active?
Over time, other apps can sometimes "steal" or override the default screenshot shortcuts, or you might have accidentally disabled them. It’s a common issue and, thankfully, a quick one to check and resolve.
Here's how to see what's going on:
- Head over to System Settings and click on Keyboard.
- Find the Keyboard Shortcuts… button and select Screenshots from the menu on the left.
- Make sure the little checkboxes next to the screenshot commands are all ticked. This is where you can confirm they’re active and assigned to the right keys.
Nine times out of ten, this is where the problem lies. A quick check here can save you a lot of headaches.
You might also run into strange visual bugs. For example, some Mac users with new Studio Displays found their screenshots were appearing massive—sometimes four times larger than expected when opened in Preview. This turned out to be a rendering issue where macOS wasn't properly scaling for the display's high resolution. You can read through the user reports on this specific issue in the Apple community forums.
My Go-To Advice: Always start with the simplest fix first. A quick restart or a peek at your Keyboard Shortcut settings will solve most screenshot problems in just a few minutes, getting you right back to work.
By running through these common culprits, you can usually get things working again on your own without having to call for tech support.
Have Questions About Mac Screenshots? Let’s Answer Them
Even once you've gotten the hang of taking screenshots on your Mac, a few common questions always seem to surface. Let's dig into the most frequent ones so you can smooth out your workflow and fix those little annoyances that get in the way.
How Can I Change the File Type of My Mac Screenshots?
By default, your Mac saves every screenshot as a PNG file. PNGs are fantastic for quality, but the file sizes can add up quickly. If you're trying to save a bit of disk space, switching to a more web-friendly format like JPG is a great idea. Luckily, you can change this with a quick trip to the Terminal.
First, pop open the Terminal app (a quick Spotlight search will find it). Then, type this command exactly as it is and hit Enter:
defaults write com.apple.screencapture type jpg
For the change to stick, you just need to give the SystemUIServer a quick reboot. Do that by entering this second command:
killall SystemUIServer
And that's it! From now on, your Mac will save screenshots as JPGs. If you ever want to go back to PNG or try another format like TIFF or PDF, just repeat the same process with your preferred file type.
What's the Best Way to Organize a Mountain of Screenshots?
A desktop buried in screenshots is a productivity killer. The absolute best way to handle a ton of screenshots is to give them a dedicated home from the start. As we talked about earlier, the first step is changing your default save location to a specific folder, maybe one called "Screenshots" inside your Documents folder.
The most effective organization strategy combines a dedicated folder with a smart naming or tagging system. This prevents chaos and makes finding a specific image weeks later a matter of seconds, not minutes.
Once you have that main folder, you can get more granular. Create subfolders for different projects, dates, or clients—whatever makes sense for your work (e.g., "Q4 Report" or "Website Redesign"). For next-level organization, I highly recommend using Finder's built-in tagging feature. You can add color-coded tags or custom keywords like "invoice" or "bug report" to each file, letting you find them with a quick search, no matter where they're buried.
My Mac Screenshot Shortcut Isn't Working—What Should I Do?
When your go-to Cmd+Shift+4 suddenly gives you the cold shoulder, don't panic. The fix is usually pretty simple.
Start by checking your keyboard settings. Head over to System Settings > Keyboard > Keyboard Shortcuts, and click on Screenshots in the sidebar. Make sure the shortcuts you rely on are actually enabled with a checkmark. Occasionally, another app you've installed might hijack the shortcut for its own use. If all the settings look correct, a good old-fashioned restart of your Mac often clears up the glitch.
Ready to turn those plain screenshots into professional, shareable assets? GrabShot.io makes it incredibly easy to add beautiful backgrounds, elegant shadows, and clear annotations in just a few clicks. Stop sending boring screen captures and start creating visuals that actually impress. Give it a try for free and see the difference at https://grabshot.io.